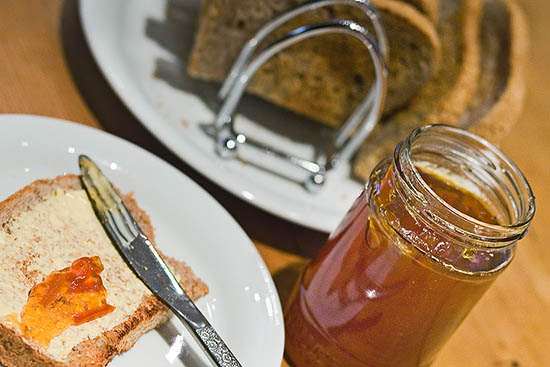
John had a hankering for ‘real marmalade’ so as Seville oranges are in season we decided to have an attempt at making it. The first task, not having made it before, was to track down a straightforward simple recipe and the second to adapt it for the slow cooker to cut out on the ‘faffing about’.
So as the weather forecast wasn’t great today – we made marmalade and damn fine it is to as you can see in the photo below!

Here is our marmalade recipe. Makes 6-8 jars
1 kg Seville oranges
1.7 litres near-boiling water
Juice of 2 lemons
2 kg sugar
Wash and scrub the oranges if you are obsessive; then cut them in half, squeeze the juice and keep it somewhere for later. Remove the membrane, pith and pips etc. with a spoon (you can slightly warm the cut oranges in a microwave if you want to make this easier) and tie all this up in a piece of muslin. Slice the orange peel into strips (removing as much pith as possible), chunks, or whatever you prefer. The slices you cut at this point will determine the size of the shreds/chunks in the finished marmalade don’t feel you have to put it all in. We tend to put about two thirds of the rind in.
Put the peel and the muslin bag full of pips and orange flesh in to the cooking pot of the slow cooker. Pour over the water and lemon juice. Cover and switch to high, leave for 6 hours. Alternatively we reckon that you could put it on low and leave it overnight – but we haven’t tried this yet. The peel must be really soft before adding the sugar.
Remove the muslin bag and leave it until cool. Squeeze the liquid from it into a large pan. Add the rind and cooking liquid from the slow cooker and then add the sugar. Finally pour over the orange juice you squeezed from the oranges earlier. Heat gently until the sugar has dissolved.
Put a plate in the freezer at this point to test the setting point later.
Bring to the boil and keep boiling rapidly for 15 minutes until the marmalade reaches 105°C on a sugar thermometer. If you don’t have a sugar thermometer, you can put a few drops of the liquid onto your frozen plate out of the freezer, and leave it for about a minute. Push it along a bit with a finger. If it leaves a ‘wrinkly track’ then it has reached the setting point – if not, keep boiling.
The setting point was a learning curve for us (and we don’t have a thermometer) but get it boiling gently. You don’t want a big ‘frothy’ boil – more of a point just beyond a simmer. For the first 15 minutes or so it will look a bit watery, as it gradually thickens it will become more viscous and you should have what other recipes describe as a ‘rolling boil’ (this is sort of how you imagine an Icelandic mud hole bubbling away). Keep stirring to ensure it doesn’t burn. Ours actually took about 30 minutes in total before the it left a ‘tacky track’ on the plate test.
Once the setting point has been reached, turn off the heat and skim off any scummy nastiness from the top. Leave it all to cool for about 15 minutes.
Put your clean jars into the oven, at about 120°C so that they are sterilised and warm when the hot marmalade goes in later; alternatively get them hot (and dry) out of the dishwasher when it has finished.
Stir the marmalade to distribute the peel evenly, then ladle into the heated jars. Seal with waxed paper, clean and leave to cool with a cloth over the top. When they have completely cooled, top with jam pot covers and lids and label.
Store somewhere cool and dry and use within a year.
Actually it tastes pretty good. Next year we’ll experiment with some variations; perhaps adding some grapefruit juice to make it a tad sharper or even some whisky for a more adult flavour. Anyway, it certainly beats that crap in the supermarkets.


Been reading your blog with interest. Beautiful land and photography and of course recipe!!!
We get strawberries in glut here. Guess what I’m filling the slow cooker with. They are cheap enough I can experiment with additional flavours, like balsamic for a classic glaze. OR Loquats, I have loads of loquats that just go off and make the parrots fat. Lowuat chutney in the slow cooker.. Hmmmm… will have to brain stor that one. Thanks for the great idea starting point!
Hi John & Liz
I read your marmalade process with interest. I have made lots of batches over the years and family and friends give it good reviews I.e there is none left after they visit.
Re the scum you talk about , this you can overcome by putting a knob of butter during the boiling period to brake up the foam. Also its important to put a waxed disk with the dull side facing up while marmalade is hot. Do not cover until stone cold or mildue may result from steam. I recycle all my jam jars ans steralise in a baby bottle steraliser. Its fast and gets the job done.
Thanks for your tips on slow cooking the marmalade I’ll give it a try next time.