One of our projects on the smallholding is to construct a barn for storing logs and implements etc. I’ve looked at commercial barns etc. and decided that in light of the cost (especially as we are planning to undertake some expensive changes to the house as well) we will build this ourselves. Disclaimer; I am not a structural engineer or a builder so the whole project is more ‘belt and braces’ than calculations and you should not rely on my design for your own building!
Originally I was was thinking about building a simple pole barn from old telegraph poles and I scoured the internet for plans. In actual fact there isn’t much available in the UK with most information being in the USA. In particular I came across the Barn Construction Resource Centre which had some nicely constructed barns. As a consequence I decided to go more down this route. Hopefully building something that looks a tad more pleasing to the eye. Hence why the title is about a pole barn but the structure is more of a ‘cut frame’. However, the same technique could be applied and could be simplified by just putting the poles straight into the ground. Not an option in my case because of the ‘landfilled ground’ where I am building it.
The first thing was to check the planning situation and to ensure that it would fall within permitted agricultural development. So the first job was to contact the local planning department and submit an ‘Application for Prior Notification of Proposed Agricultural Development’. For this you need to submit 4 copies of the application form, describing the size and type of the building, together with 4 copies of the plans showing the extent of your land and the location of the proposed building. You don’t need detailed plans of the building. The council then has 28 days to confirm that the proposal doesn’t need Planning Permission (or otherwise). In my case I got a letter after about 6 weeks saying that it was permitted development and that I didn’t need planning permission.
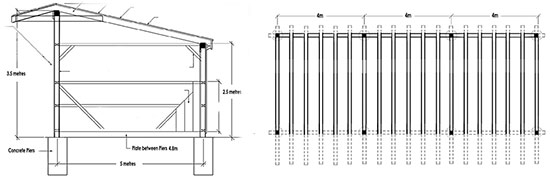
Although I knew roughly the size I was going to build the next stage was to come up with some more detailed construction plans. So using the American site above I roughed out some plans for a monopitch barn with an overhang on the front that would be about 12m long by 6m wide with 3 bays. As the plans are going to evolve as ‘I work things out’ I’ve put small copies of my initial thoughts here and hope to put better and bigger plans together with construction details as I progress. Hopefully I may by then have ironed out any snags if anyone else wants to have a go!

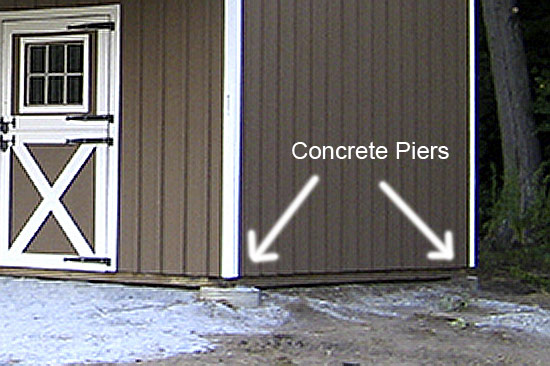
The land I am building this on was quite low and has been filled with rubble. As a consequence the soil is not ideal for foundations; so the plan is to level the top then dig eight holes down to firmer subsoil with an excavator. I will then pour a concrete pad at the bottom of each hole approx 150mm thick. Once this has cured I will form shuttering on top of the pad to pour concrete pillars that will finish approx 150mm or so above ground level. These concrete piers will have to all be perfectly level and in the correct place as the wood columns of the barn will then be built off these. This section of photo from one of the barns on the above site shows you the idea.

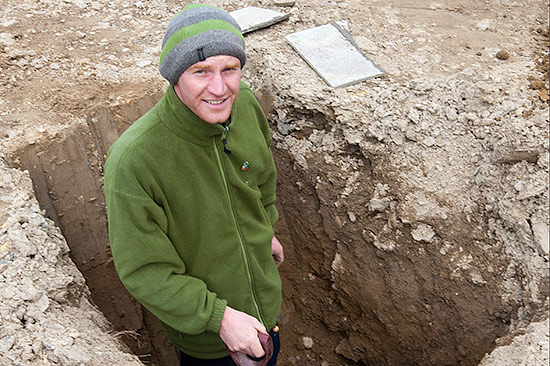
So last weekend end a neighbour came over with his JCB and scraped the land level. We then carefully marked where the columns would be; checking it was square by ensuring that the diagonals were the same distance apart. We then dug out each hole; the back ones had to be quite deep to get down to solid ground. In fact the deepest are around 2m deep!

Then this weekend I hired a mixer and got a couple of tons of ‘all in’ sand and gravel delivered and, with the help of our son who was visiting us for Easter mixed, enough concrete to fill the bottom of each hole to a depth of at least 150mm. Before tipping the concrete in we jumped in and cleaned the loose fill out by hand ensuring a nice firm base for the concrete.

The next stage will be to shutter the concrete piers of these pads and concrete these. I’ll try and keep you posted as we go!


Really impressed John/Liz makes my project seem tame!! a credit to you all.Would love to see the finished project.
Thank you for sending these photos.
John.
Thanks for this information. I need to build a shelter in my 1.5 hectare field and have been researching the possibilities. I was getting fairly despondent at the choices and beginning to accept that any inexpensive agricultural building was going to be ugly. Then I found your blog. An inspiration! I am now on the verge of submitting a planning application for a pole barn, very similar to yours (4.5m wide+overhang, 12m long, single pitch, sides finished in featherboard, back in whatever I can find that is cheap). I can use telegraph poles (and have sourced some, just need to find some transport). I have to knock up some drawings for the planning application (which I need due to size of field). Have you got any further since your last blog entry… and are you still intending to upload the plans (the drawing above is too low-res to be useful). Thanks, and well done on retiring to such a lovely looking place.
Thanks for reading the blog. Have emailed you my larger size drawings. Not sure how useful they will be. They were just really my thought process when working it out. We did build it lower at the end of the day to keep it more hidden in the landscape.
please could send me details of your plans i want too build something simualer cheers
Hi Nick
My plans are not much more than what you can see in the small photos above; so won’t be much use to you I’m afraid. If I get more time I may draw them properly one day. In the meantime I suspect that you should be able to work things out from the photographs in all the 5 parts.
Great article…just what I needed…thanks.
Karl & Lorna ( Isle of Tiree )