Building a Pole Barn Part 5

Welcome the last and final part about how I built a 12m x 5m barn for storing logs and implements on our small holding. It could also be used for sheep housing in winter. The project became more of a timber framed building than a pole barn; but you could easily adapt it and just put telegraph pole uprights straight into the ground (or concrete them in) if the land was suitable. The previous parts are here.
Part 1
Part 2
Part 3
Part 4

I must reiterate my disclaimer; I am not a structural engineer or a builder so the whole project is more ‘belt and braces’ than calculations and you should not rely on my design or construction for your own building!

After finishing the frame in Part 4 I then spread some of the shale around that we had dug up when building the house extension to provide a firm floor. I would have liked concrete but it was just too expensive for this project.

transport_box
Spreading the shale with my hydraulic transport box on my Alpine Tractor

The next thing I did was build a single brick pier around the base of each column. This is to ensure that the columns cannot move laterally in any direction even if hit with a tractor and to provide a support to keep the bottom rail for the cladding off the ground. It also means that I can pour preservative or perhaps waste oil down between the brick and the wood every year or two to stop the base rotting! The columns are also on a piece of damp proof membrane for this reason as well. The photo below shows this.

Bricks around foot of Column
Bricks around foot of  each column to help stop lateral movement of column and support the cross rails for attaching vertical boarding.

Horizontal rails were fixed across between the columns and the vertical boarding nailed to these with approximately 20mm air gaps. The photo below shows the cross rails and the boarding nailed on the back. All the timber was supplied treated so no need for any preservative other than on the cut ends and joints.

rails
Note the cross rails to nail the boards to. The bottom one supported on a brick and the centre one by a vertical timber off the bottom rail.

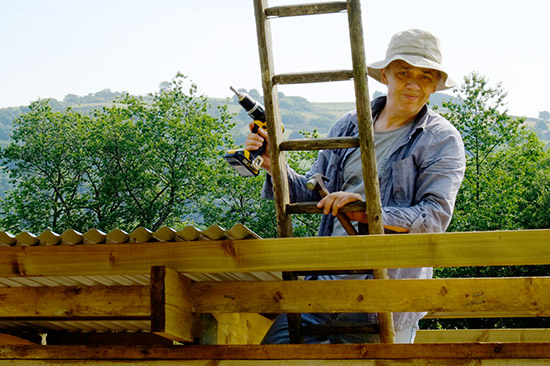
All that was left to do was cut all the side boards to the correct height and fix them before fixing the end cover strip which is fixed over (and through the roofing sheets) and covers the top of the side timbers to give a nice clean finish.

Barn
The finished barn with one closed bay and two open bays.

We’ve always been keen that it would be hidden in the landscape as much as possible so deliberately set in the lowest spot and formed a soil bank in front of it. This will be planted to screen it from view..

Barn Landscaped
The barn is landscaped into the surroundings so that once we have planted the soil bank in front of it it will be almost completely hidden.

So there you have it our barn that we built entirely ourselves. Some people have asked about costings and this is of course a lot more than if we had used telegraph poles and second hand roofing sheets. But I estimate.

Clearing the site/digging footings      £100
Timber Frame                                    £700
Roofing Sheets                                  £700
Timer Boarding and support rails      £500
Nails/Screws/Sand/Cement etc        £150
Total                                                   £2150

That’s it; I may put some light field gates on the openings to keep the sheep out (or in if I put them inside) and I may build a sheep handling area next to it.

So that could be another project!

Share

Building a Pole Barn Part 4

The fine spell of hot weather in July 2013 has meant that we can ‘crack on’ with getting the barn erected. Previous posts are here

Part 1
Part 2
Part 3

At the end of part 3 John and Jonathan were leaning smugly against the frame having assembled it. After Jonathan went back home to Spain, I (John) carried on fixing the 75mm x 50mm purlins across the rafters. These are necessary to support and fix the roofing sheets. I decided to use simple corrugated steel sheets for the roof. These are not too expensive or too heavy and are easily fixed. As the shed is partly open condensation should not be too much of a problem in winter. The sheets can be bought as plain galvanised or painted or plastic coated with the price and durability increasing accordingly. I went for the latter (most expensive and most durable) in a slate grey colour.

John and Purlin
Here you can see the purlins that John is resting the ladder on. They are nailed to the rafters and also have galvanised straps at places for ‘a belt and braces’ approach to gusting wind!

Each sheet of corrugated steel is 1m wide when lapped with its neighbour and they can be bought in any length to cover the exact span (remembering to leave enough overhang for the gutter). In my case I am overlapping them a tad more to save cutting the last sheet. It is of course essential that the first sheet is positioned correctly or they will all start ‘running out’ of alignment.

shed2
John marks where to fix the sheets by hooking a line over the last fixing and along the centre of the purlin.

The position of the fixings can then be marked. The Tek screw fixing are self cutting but I found it easier to either drill a pilot hole or just bang a small nail through.

John marks where to fix the sheets
The sheets are fixed through the top of the corrugation, not the valley, to prevent leaks. The screws are self tapping but I found it easier to make a starter hole with a nail.

If you don’t carefully mark the line of the purlin you risk having a hole in your roof and nothing underneath to screw into!

The Tek screw has a rubber collar
The Tek screw has a rubber collar to prevent water ingress.

The screws should be tightened down until they are holding firmly but not crushing the corrugation. They can be capped of with plastic caps (a dab of silicone under the cap before putting them on is not a bad idea to stop them coming loose).

It is screwed into the purlin with an 8mm nut driver on an electric drill
Here you can see the fixed roof with another sheet waiting to be fixed.
Here you can see the fixed roof with another sheet waiting to be fixed as I work my way across the roof.

So the roof will soon be finished and then I only have to fix the side cladding boards and do a bit of tidying up etc which I hope to show in the last part.

Go to Part 5 (the finished barn!)

Share

Building a Pole Barn Part 3

If you missed Parts 1 and 2 you can find them here
Part 1
Part 2

The foundations  were finished around July 2012. Each pier has a galvanised anchor strap set in it an the columns will be secured to these.The foundations are finished

The foundations were finished in around July 2012

Unfortunately everything then went on hold due to a combination of the wet weather and us starting the building work on the house. I found a local sawmill here in Carmarthenshire and Rocco at Talley sawmills sourced some larch and cut it to my specifications. Rocco is definitely a ‘character’ and not necessarily the fastest but he found, cut and treated all the timber for me for a very reasonable price. So I’d definitely suggest that you ‘sound out’ your local saw mill for a project like this.

In essence I am using 200mm x 200mm upright columns each with a cut in one end to accept 200mm x 100mm cross beams; these will be bolted together. Then rafters will span across the barn and these are  200mm x 100mm above each column with (2) 200mm x 50mm rafters in each bay.The latter will be secured by upside down joist hangers. Each column will rest on the concrete pads with a d.p.m. and be secured to the galvanised straps in the concrete base.

Sounds complicated but should become obvious from the photos.

It was several weeks before the timber was delivered and things gradually ‘slipped’ so it was not until June 2013 when Jonathan, our son, came home again and he was press ganged into helping with some of the heavy lifting that we started the build. When we first erected the columns we decided that the barn was just going to be too tall. It would be fine on a working farm; but would be too visible in the landscape. So with the help of a chainsaw I reduced the columns to a height that gave sufficient access for a tractor but that was not too high so as to be visible from the house and from the other side of the valley.

_DSF1155
After Erecting the 200mm x 200mm Columns the 200mm x 100mm cross beams are drilled and bolted in place.
_DSF1202
Then the Rafters are Placed Across the Span

Getting the first cross pieces into place was a tad tricky as nothing was really secured and it was all a bit wobbly! But after we started to drill and bolt the joints the frame started to become more rigid. We then had to constantly check that columns were plumb and that distances were the same between openings etc. But after around two days work we had the basic frame in place. It still needs horizontal rails to board the external boarding to and needs some purlins/battens across the rafters to fix the roofing sheets to.

_DSF1182
The 200mm x 50mm Rafters are Put in Place First and Secured with Joist Hangers
_DSF1223
The barn frame takes shape; just the 4 thicker (100mm) and heavier rafters to be put in place; one above each column. Luckily a friend dropped by at just the right moment to help with the lifting!

We also found that it needed some triangular braces between horizontal beams and columns to increase its stability.So these were duly added and treated with preservative.

_DSF1234
Cross bracing and detail showing bolts and joist hangers
_DSF1233
The Finished frame for the barn; now you can see why we didn’t want it to stand out in the landscape. The excess soil heaps will be landscaped and planted to form a screen. It is really important to us that it is not visually intrusive.
_DSF1230
John and Jonathan prove that it will not fall down by leaning on the finished frame!

But at least it is starting to look like a shed. The next post will show the roof and boarding, just as soon as I’ve sourced these! Whilst I don’t have prices for these yet I’m expecting the whole barn to cost around £1500 – £2000 which I don’t think is too bad for a 12m x 5m barn. It could be built for half of this by careful sourcing of things like second hand roofing sheets etc.

Disclaimer; I am not a structural engineer or a builder so the whole project is more ‘belt and braces’ than calculations and you should not rely on my design for your own building!

Go to part 4

Share

Building a Pole Barn Part 2

Following on from our first page about building our own barn we have started constructing the piers to support the upright timbers that will form the barn uprights. As previously described these footings have had to be a substantial depth in places to get down below the in-filled ground where we are building the barn.

New shuttering
The first job was to construct some shuttering. In this case I used the cheapest timber I could find (which turned out to be T&G pine cladding). This certainly wouldn’t be strong enough for professional use; but hopefully will last to build 8 piers.

I decided to construct the deepest pier first and will then cut the shuttering down as we progress to the smaller ones. So the shuttering was carefully placed in the first hole on the concrete pad, ensuring that the centre of the shuttering in the hole would be 4m from the next. The shuttering was then given extra support with some soil around the base and bits of wood wedged between it and the sides of the hole. Liz gave the inside of the timber a coating of Aldi’s cheapest cooking oil to help stop the shuttering sticking. I then proceeded to fill it with concrete. I put some steel mesh (that I had left over here) in the centre (ensuring 50mm concrete cover to ensure that it wouldn’t cause the concrete to spall if it rusts). As I filled the shutter with concrete I used a thin stick to ‘poker’ the concrete to remove air bubbles etc.

Concrete column
Concrete pier constructed off the concrete pads we put in the bottom of the hole first. The piers have steel reinforcement and a galvanised strap set in the top to anchor the wooden barn columns.

I set a small marker pin in the top in the exact centre to help with measuring to the other columns and also set a galvanised steel strap in the top of the column exactly 100mm from the centre. This strap should(!) be in the correct place to anchor the 200mm square timber uprights I’m looking to use for the barn columns.

After 48 hours I unscrewed the shuttering and removed it to leave an impressive concrete foundation column going down nearly 2m. I reckon this should be adequate for what is after all a rather large garden shed!

Setting Out
Once we had the first column in place we then started to set out the next one by stringing a centre line through the rest of the holes along the back of the shed.

By running a string line and measuring we were then able to position the shuttering for the next column. However, we also had to ensure that the top of the concrete would finish level with the first (i.e. we are now having to work in 3 dimensions). Lacking an expensive laser level I bought a cheap water level off Ebay for a few pounds and used this old fashioned technology to get the columns level. By putting the shuttering in upside down first I could measure how much to cut off the bottom before inverting it and repositioning and rechecking prior to concreting the second column. This process will be repeated until we have done all 8 columns.

Using a water level to determine the column levels
To show this clearly I am holding the level on the outside of the shuttering. The water level (coloured with a bit of food colouring) allows me to check that the top of the shuttering is exactly the same height as the first column.

Disclaimer; I am not a structural engineer or a builder so the whole project is more ‘belt and braces’ than calculations and you should not rely on my design for your own building!

Continue to Part 3


Share

Building a Pole Barn Part 1

One of our projects on the smallholding is to construct a barn for storing logs and implements etc. I’ve looked at commercial barns etc. and decided that in light of the cost (especially as we are planning to undertake some expensive changes to the house as well) we will build this ourselves. Disclaimer; I am not a structural engineer or a builder so the whole project is more ‘belt and braces’ than calculations and you should not rely on my design for your own building!

Originally I was was thinking about building a simple pole barn from old telegraph poles and I scoured the internet for plans. In actual fact there isn’t much available in the UK with most information being in the USA. In particular I came across the Barn Construction Resource Centre which had some nicely constructed barns. As a consequence I decided to go more down this route. Hopefully building something that looks a tad more pleasing to the eye. Hence why the title is about a pole barn but the structure is more of a ‘cut frame’. However, the same technique could be applied and could be simplified by just putting the poles straight into the ground. Not an option in my case because of the ‘landfilled ground’ where I am building it.

The first thing was to check the planning situation and to ensure that it would fall within permitted agricultural development. So the first job was to contact the local planning department and submit an ‘Application for Prior Notification of Proposed Agricultural Development’. For this you need to submit 4 copies of the application form, describing the size and type of the building, together with 4 copies of the plans showing the extent of your land and the location of the proposed building. You don’t need detailed plans of the building. The council then has 28 days to confirm that the proposal doesn’t need Planning Permission (or otherwise). In my case I got a letter after about 6 weeks saying that it was permitted development and that I didn’t need planning permission.

Although I knew roughly the size I was going to build the next stage was to come up with some more detailed construction plans. So using the American site above I roughed out some plans for a monopitch barn with an overhang on the front that would be about 12m long by 6m wide with 3 bays. As the plans are going to evolve as ‘I work things out’ I’ve put small copies of my initial thoughts here and hope to put better and bigger plans together with construction details as I progress. Hopefully I may by then have ironed out any snags if anyone else wants to have a go!

Barn Plans
The ‘rough idea’ of how things will look. I’ll add bigger more detailed plans at a later stage once I know things are going vaguely according to my ideas!

The land I am building this on was quite low and has been filled with rubble. As a consequence the soil is not ideal for foundations; so the plan is to level the top then dig eight holes down to firmer subsoil with an excavator. I will then pour a concrete pad at the bottom of each hole approx 150mm thick. Once this has cured I will form shuttering on top of the pad to pour concrete pillars that will finish approx 150mm or so above ground level. These concrete piers will have to all be perfectly level and in the correct place as the wood columns of the barn will then be built off these. This section of photo from one of the barns on the above site shows you the idea.

Concrete Piers for Barn
Concrete Piers for Barn. As these go down below the infill to solid ground the barn should remain stable. Once the land has settled for a few years the level can be made up with stone or even concrete.

So last weekend end a neighbour came over with his JCB and scraped the land level. We then carefully marked where the columns would be; checking it was square by ensuring that the diagonals were the same distance apart. We then dug out each hole; the back ones had to be quite deep to get down to solid ground. In fact the deepest are around 2m deep!

Barn Foundations
The land levelled, holes dug and concrete pads at the bottom of each hole. We will then construct concrete piers off each pad in exactly the right place for the barn uprights. I’ll probably put a bit of steel mesh (some lying around somewhere!) for extra reinforcement in these.

Then this weekend I hired a mixer and got a couple of tons of ‘all in’ sand and gravel delivered and, with the help of our son who was visiting us for Easter mixed, enough concrete to fill the bottom of each hole to a depth of at least 150mm. Before tipping the concrete in we jumped in and cleaned the loose fill out by hand ensuring a nice firm base for the concrete.

Jonathan
Jonathan gets to spend an exciting Easter in a hole when he visited his parents! The holes at the back are nearly 2m deep so dad got sent down those.

The next stage will be to shutter the concrete piers of these pads and concrete these. I’ll try and keep you posted as we go!

Mixing Concrete
John and Jonathan mix concrete. The container, in the background, is a recent arrival in preparation for storing materials when we do the building work on the house. Once that is done it will probably be moved to sit alongside the barn to provide secure storage.

Go to part 2 to learn more

Share

Fencing and Cutting Back Overgrown Hedges

One of the tasks that had to be done after planting our new woodland was fencing the area to prevent stock getting in amongst the trees and eating them. So in the last week or so we have had contractors here cutting back the overhanging trees and hedge and installing some new fencing and gates.

Post and wire fence
The New Fence runs up past the established wood and fences off some of the newly planted wood. We have put in metal gates for easy access in the future.

The contractor was hoping to be able to use his tracked post hole knocker for most of the work but the slopes and wet land conspired to make this a bit problematic. So some of the fencing work had to be done by hand. We also have a bit of ‘making good’ to do with the pasture once the land dries out a bit..

Agricultural Fencing
We have a bit of pasture to reseed etc. We thought we might try putting a Barn Owl box on the tree that we had to cut a large branch off.

We also took the opportunity to fence around the spring that feeds our house water supply. It is good practice to do this to prevent the possibility of animals fouling the supply. Also this area should become quite wild and overgrown providing a moist habitat for insects and animals etc.

Fence around water Supply
Our new fence around water supply to keep out the pathogens!
Share

The PV Solar Panels are Fitted

On moving to live here to Wales we decided to try and make the house as inexpensive and as environmentally friendly to run as we reasonably could. Not because we are ideologically driven but because it seems to make sense and we would like the house to be as comfortable as possible.

The completed solar panels on the garage roof
The completed solar panels on the garage roof ready to provide us with electricity and an income for 25 years. A very tidy installation.

With the government scheme to pay a feed in tariff for home generated electricity it also seemed to make sense purely from a financial point of view if we had a bit of spare cash sitting in a low interest account. We originally looked at this in November 2010 and the installation costs for a 4kw domestic installation was then around £15,500. Since then the price of PV panels has dropped considerably. Unfortunately the government subsequently took a rather hasty decision to suddenly cut the tariff paid to householders. So we had ‘missed the boat’. However, this knee jerk reaction hit the industry hard and panel prices subsequently continued to fall in price.

So when we reviewed things at the end of January 2012 the installation costs had nearly halved; meaning that the return on investment would almost be the same. Furthermore the government’s decision is subject to ongoing legal challenge that could still possibly reverse the tariff decision. With this in mind we decided to go ahead with the installation on the south facing garage roof. There is a calculator for working out income and savings here.

The all important generation meter
The all important generation meter on the right.

Unfortunately the industry has become a bit of a ‘get rich quick’ scheme with plenty of ‘dubious’ solar panel installation companies springing up. At times it seems like the ‘Wild West’ out there! In some cases these firms are fitting installations in a pretty unsatisfactory manner; simply by drilling through slates or tiles and fitting rubber sealing grommets. Sometimes these are not even fixed into structural timbers but screwed into the battens. Even if they are watertight when fitted I can’t see how the wind loading will not put a flexing load on the slates and tiles causing some to break over time; nor can I see how the grommets will not perish over a period of time. I certainly wouldn’t want this type of installation on our garage roof let alone our house. How many of these ‘here today – make a quick buck’ operators will be around in 5 years or ten years time when these failures start to appear?

So having got a few quotes we decided to use a very local contractor Jones Electrical (who have been working in the area for over 50 years) reasoning that they were not likely to disappear next week and their reputation would be important to them. So last week their roofing subcontractor arrived and started on the roof whilst the electricians installed the wiring and inverter (which converts the D/C current from the panels into A/C for the mains).

The roof brakets and rails being installed
The roof brackets and rails being installed. Note how each bracket is secured to the structural roof timbers then flashed with a lead tile.

The roofer proved to be excellent taking great care to properly fix the roof hooks to the structural timbers and to flash them all correctly with lead. The brittle Spanish slates meant he couldn’t work as fast as he had hoped but there was no way that he was compromising on the job. So full marks to the roofer and his son for their conscientious approach to the job. Jim Jones who started the electrical business 54 years ago personally turned up to check on progress and ensure that all was going smoothly. It is really refreshing to find small local businesses going the extra mile rather than just jumping on the bandwagon.

The roofer working on the roof

So today it was finished and the electricians came to correct an earthing problem on our existing system and to turn on the system and we are now generating our own electricity (or rather will be in when the sun shines as it was too dull by the time it was all finished). I’ll try and remember to update the blog in a years time when we know how much we are actually producing. All I have to do now is work through the paperwork to sell our electricity to our electricity supplier!

Share

Planting Our New Wood in Wales

Well it’s just over a year since we moved to Wales and time has flown by. When we first moved here we both felt that it might be good to plant some more native woodland. Our reasoning was that, although we won’t be alive to see the mature trees, this would be our opportunity to leave a small legacy for the future together with providing great habitat for wildlife. Not to mention that it would go some way to reducing our carbon footprint.

Planting Native Woodland on our Smallholding
Our two man tree planting team plant 3600 trees in around 3 days!

Accordingly we are planting the steepest parts (around 5.5 acres) of our land with around 3600 trees to create a native wood that will encourage biodiversity. Anyway today our two man planting team, working for Howard at Heritage Woodlands, arrived and started to mark out the land prior to planting the trees complete with stakes and tree guards.

Steep Woodland planting
The land is steeper than it looks with the tyre tracks showing where the Quad bike had difficulties; so everything is being done by hand on the slope.

The planting mix consists of 50% Ash, 20% Oak, 10% Hazel, 10% Field Maple and 10% Bird Cherry. The planting is hard work as it involves walking up and down the slope all day so the guys have our admiration as they are planting around 1000 trees a day between them! Of course for each tree they have to walk up and down 4 times (digging the hole, planting the tree, putting the guard on and putting the cane in).

Trees planted on our land
Trees being planted on our land in Wales.

Once the planting is finished the area around each tree will be sprayed to help keep them free from grass etc. Now we will have the task of keeping the planting clean for a few years until the trees are growing well. Voles can be a particular problem if the grass gets too long; as they can get inside the plant guards and start gnawing the bark of the trees.

It will be great to look back in 10 years time once the trees have started to get established.

One day, long after we have ‘kicked the bucket’ there will be a woodland here for future generations to enjoy and timber to use or to heat someone’s house. Hopefully the Buzzards and Red Kites will still nest here and wheel overhead. There is nothing more glorious than wandering out on a Spring morning and hearing the cry of the Buzzards. In a world of short term thinking it feels rather refreshing to be doing something that will take 50 to 100 years to come to maturity.

Share

Ino Flail Mower Arrives

Having bought the right tractor (AGT 850) to work on our steep slopes it was necessary to get a mower/topper to deal with the overgrown grass, bracken and rushes on the land. At this stage things are not too bad, but the land has been let go for a while and if not tackled soon the pasture will start reverting to being overgrown with bracken and scrub etc..

Flail mower
John with the INO MMT Flail Mower on the AGT 850 Tractor

First decision was whether to get a rotary mower (less expensive) or a flail mower. The former is more usually used for simple pasture topping the later for ‘chewing’ up scrub and bracken. The former is generally much cheaper (and uses less fuel). However, the need to deal with some bracken and thick grass meant that I thought the later would be more suited (and also have better weight distribution when attached to the tractor on the steep land). The next question was what make to buy? There are numerous models out there; many now made in China some with what can only be described as ‘chocolate’ gearboxes. Good second hand flail mowers rarely come on the market and often the bearings and gearboxes have had a thrashing; hence it was a case of buying new again for this key bit of equipment

I settled on an INO flail mower which are made in Slovenia by a company that has been going for 20 years or so (they are also rebadged by other manufacturers in the UK and sold under their own trade names).

I purchased it directly from the importers (Willow Farm Machinery) who shipped it by carrier. Unfortunately the carrier’s lorry was too large to get down our lane! After some lateral thinking the driver delivered to a nearby agricultural dealer who kindly brought it here on a trailer for a small reward (drink!).

After hitching up to the AGT I had to cut down the PTO shaft which was too long; greased the bearings and off I went. We have had a particularly dry spell which is ideal (as working on our slopes in the wet could be suicidal!). The tractor and mower coped admirably on even the steepest bits. However, turning at the top of the steepest slopes looked a tad dangerous – so I dealt with these by reversing up and then mowing coming down. I did notice one or two local farmers slowing down on the road below to see what I was up to; most seem quite intrigued to see an Alpine tractor rather than a traditional tractor!

Once all the land has been topped (I didn’t get it all finished due to it turning wet) I shall use some Asulox spray to treat the worst areas of bracken as they start to regrow and probably also spray some of the rushes with Headland Polo. Once this has been done (perhaps a couple of times) I should not need to use chemicals much with an annual top with the flail keeping things under control.

Share

Working on the Land

Since arriving here in Carmarthenshire last November we’ve been taking our time to decide what to do with things. We do not plan to actively farm our smallholding but to get the land back into shape before perhaps letting the pasture for sheep, creating some more woodland and harvesting the wood from our established woodland.

hedge
The Newly Cut Back Boundary and Repaired Fence

During January and February John spent some time with our adjoining neighbour cutting back the overgrown branches and mending the fences as the existing posts were breaking off. During March we have had such a long spell of dry warm weather that we started cutting up the timber and burning the brash.

chainsaw
Liz 'poses' with the Chainsaw (Wot no protective trousers or gloves?)
fire
John Gets the Fire Going (eventually!)

We did get quite distracted watching the Buzzards and Red Kites circling above us in the valley.

house
Our House Down in the Valley Below
Share