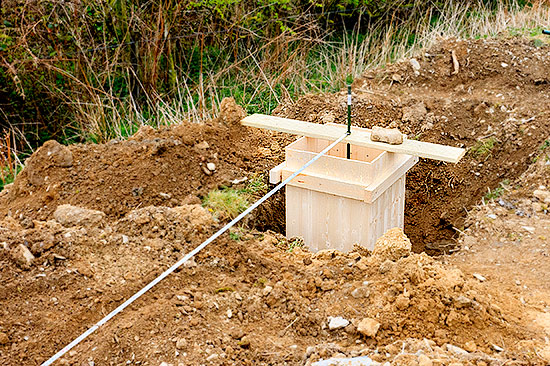
Following on from our first page about building our own barn we have started constructing the piers to support the upright timbers that will form the barn uprights. As previously described these footings have had to be a substantial depth in places to get down below the in-filled ground where we are building the barn.

I decided to construct the deepest pier first and will then cut the shuttering down as we progress to the smaller ones. So the shuttering was carefully placed in the first hole on the concrete pad, ensuring that the centre of the shuttering in the hole would be 4m from the next. The shuttering was then given extra support with some soil around the base and bits of wood wedged between it and the sides of the hole. Liz gave the inside of the timber a coating of Aldi’s cheapest cooking oil to help stop the shuttering sticking. I then proceeded to fill it with concrete. I put some steel mesh (that I had left over here) in the centre (ensuring 50mm concrete cover to ensure that it wouldn’t cause the concrete to spall if it rusts). As I filled the shutter with concrete I used a thin stick to ‘poker’ the concrete to remove air bubbles etc.

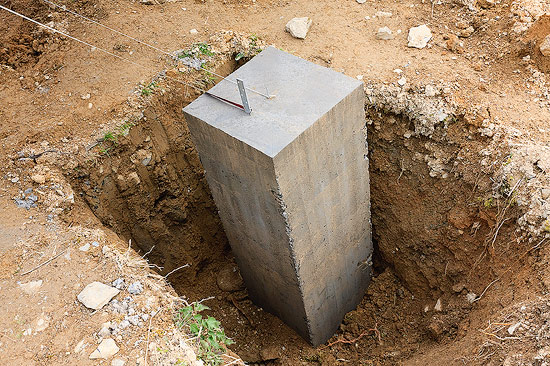
I set a small marker pin in the top in the exact centre to help with measuring to the other columns and also set a galvanised steel strap in the top of the column exactly 100mm from the centre. This strap should(!) be in the correct place to anchor the 200mm square timber uprights I’m looking to use for the barn columns.
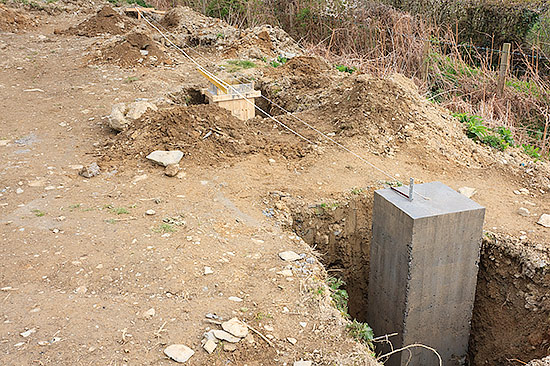
After 48 hours I unscrewed the shuttering and removed it to leave an impressive concrete foundation column going down nearly 2m. I reckon this should be adequate for what is after all a rather large garden shed!

By running a string line and measuring we were then able to position the shuttering for the next column. However, we also had to ensure that the top of the concrete would finish level with the first (i.e. we are now having to work in 3 dimensions). Lacking an expensive laser level I bought a cheap water level off Ebay for a few pounds and used this old fashioned technology to get the columns level. By putting the shuttering in upside down first I could measure how much to cut off the bottom before inverting it and repositioning and rechecking prior to concreting the second column. This process will be repeated until we have done all 8 columns.

Disclaimer; I am not a structural engineer or a builder so the whole project is more ‘belt and braces’ than calculations and you should not rely on my design for your own building!
Continue to Part 3


Looks professional to me John/Liz.I’m sure this would support anything.
Best regards. John.
Hi John and Liz
Looking great can`t wait to see the finished barn. Just a thought, but instead of cutting your shuttering down for each pier on site we would often put a few nails through the shuttering to use as a level mark.
All the best Nick
That’s fair comment and now that the remaining piers are more of a similar size I am marking the inside of the shuttering with a line scratched with a nail and levelling to that level. So pretty much using a similar technique as you suggest.
Nice barn. What type of timber did you use? Where did you get the roof sheeting from? We live near Cardigan