
The fine spell of hot weather in July 2013 has meant that we can ‘crack on’ with getting the barn erected. Previous posts are here
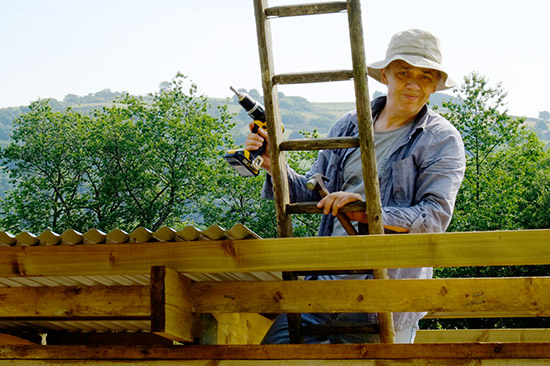
At the end of part 3 John and Jonathan were leaning smugly against the frame having assembled it. After Jonathan went back home to Spain, I (John) carried on fixing the 75mm x 50mm purlins across the rafters. These are necessary to support and fix the roofing sheets. I decided to use simple corrugated steel sheets for the roof. These are not too expensive or too heavy and are easily fixed. As the shed is partly open condensation should not be too much of a problem in winter. The sheets can be bought as plain galvanised or painted or plastic coated with the price and durability increasing accordingly. I went for the latter (most expensive and most durable) in a slate grey colour.
Each sheet of corrugated steel is 1m wide when lapped with its neighbour and they can be bought in any length to cover the exact span (remembering to leave enough overhang for the gutter). In my case I am overlapping them a tad more to save cutting the last sheet. It is of course essential that the first sheet is positioned correctly or they will all start ‘running out’ of alignment.

The position of the fixings can then be marked. The Tek screw fixing are self cutting but I found it easier to either drill a pilot hole or just bang a small nail through.

If you don’t carefully mark the line of the purlin you risk having a hole in your roof and nothing underneath to screw into!

The screws should be tightened down until they are holding firmly but not crushing the corrugation. They can be capped of with plastic caps (a dab of silicone under the cap before putting them on is not a bad idea to stop them coming loose).


So the roof will soon be finished and then I only have to fix the side cladding boards and do a bit of tidying up etc which I hope to show in the last part.
Go to Part 5 (the finished barn!)

Thanks v much for this great piece of advice. Looks like a masterful bit of work. Could you give me an indication of how much the whole project cost? Need a small building for my pedigree cattle to be housed during the worst of the winter and this might be absolutely ideal. Thanks again.
Thanks for commenting on the blog. I intend to post costings/thoughts in the last section when I’ve finished but I’m still waiting for the timber from the sawmill!
The ground works were about £80 to dig the holes and a ton or two of sand/gravel and cement say £50
The frame cost about £700 in total
The roof cost around £700 (but I went for the most expensive plastic coated sheets)
Not sure yet of cost of timber cladding for the sides
You could do it much cheaper by using telegraph poles for the columns and just concrete them in the ground (I was building on unstable infill)
And you can halve the cost of the roof by using the plain galavanised sheets or even second hand ones for even less.
Hi,
I’ve found this to be the most helpful guide to building a pole-barn I’ve come across on the web – thanks very much for posting it! Could you tell me if that’s damp-proof membrane you’ve put between the posts and the concrete pads? How did you arrange the steel mesh in the concrete piers? Did you just role it into a tube or something? Was it difficult to align the galvanised straps accurately in the concrete?
Thanks for any advice you can give 🙂
Paul
Yep I’ve put a piece of dpm between the concrete and the timber
The steel mesh was just cut from some old road mesh I had lying about and I just held it in place whilst pouring the concrete. The main thing is make sure that there is at least 25mm of concrete cover to stop the metal corroding. It’s overkill really – I don’t think it needs reinforcing; but if you have a bit of Rebar or something around you could use it (you can find it on Ebay)
As I did each pier one at a time I marked the exact centre point of each pier by measuring the distance to the next one and then checking the hypotenuse of each triangle; that way things had to be square and accurate. The galvanised strap was held in place as the concrete was poured and could be positioned fairly accurately.
You could always not bother with the strap and drill the concrete afterwards to use concrete bolts and fix brackets at a later stage. People tell me Thunderbolts are good
http://www.grampianfasteners.com/thunderbolt.aspx
Since the above I’ve also built a single brick pier around the base of each column to stop them moving and to keep the cross rails off the ground (that the external cladding will be fixed to).
The external cladding timber is being delivered tonight so with luck I’ll have it finished in a week or so and will post some more photos showing what I mean.
Well, I’ve built three structures with the wavy galvanized metal roof and I always thought you where supposed to attatch in the low spot……wow thanks for the tip, I’m surprised I haven’t had more leaks……..